Process
Drafting Couture-Scale Gowns for Art Dolls: Muslins, Seam Allowances, and Fit Tests
Map the sculpted body, establish fit in muslin, then refine seams, fabric behavior, and closures for a gown that reads convincingly at miniature scale.
By Sophie Harrow
· 15 min read
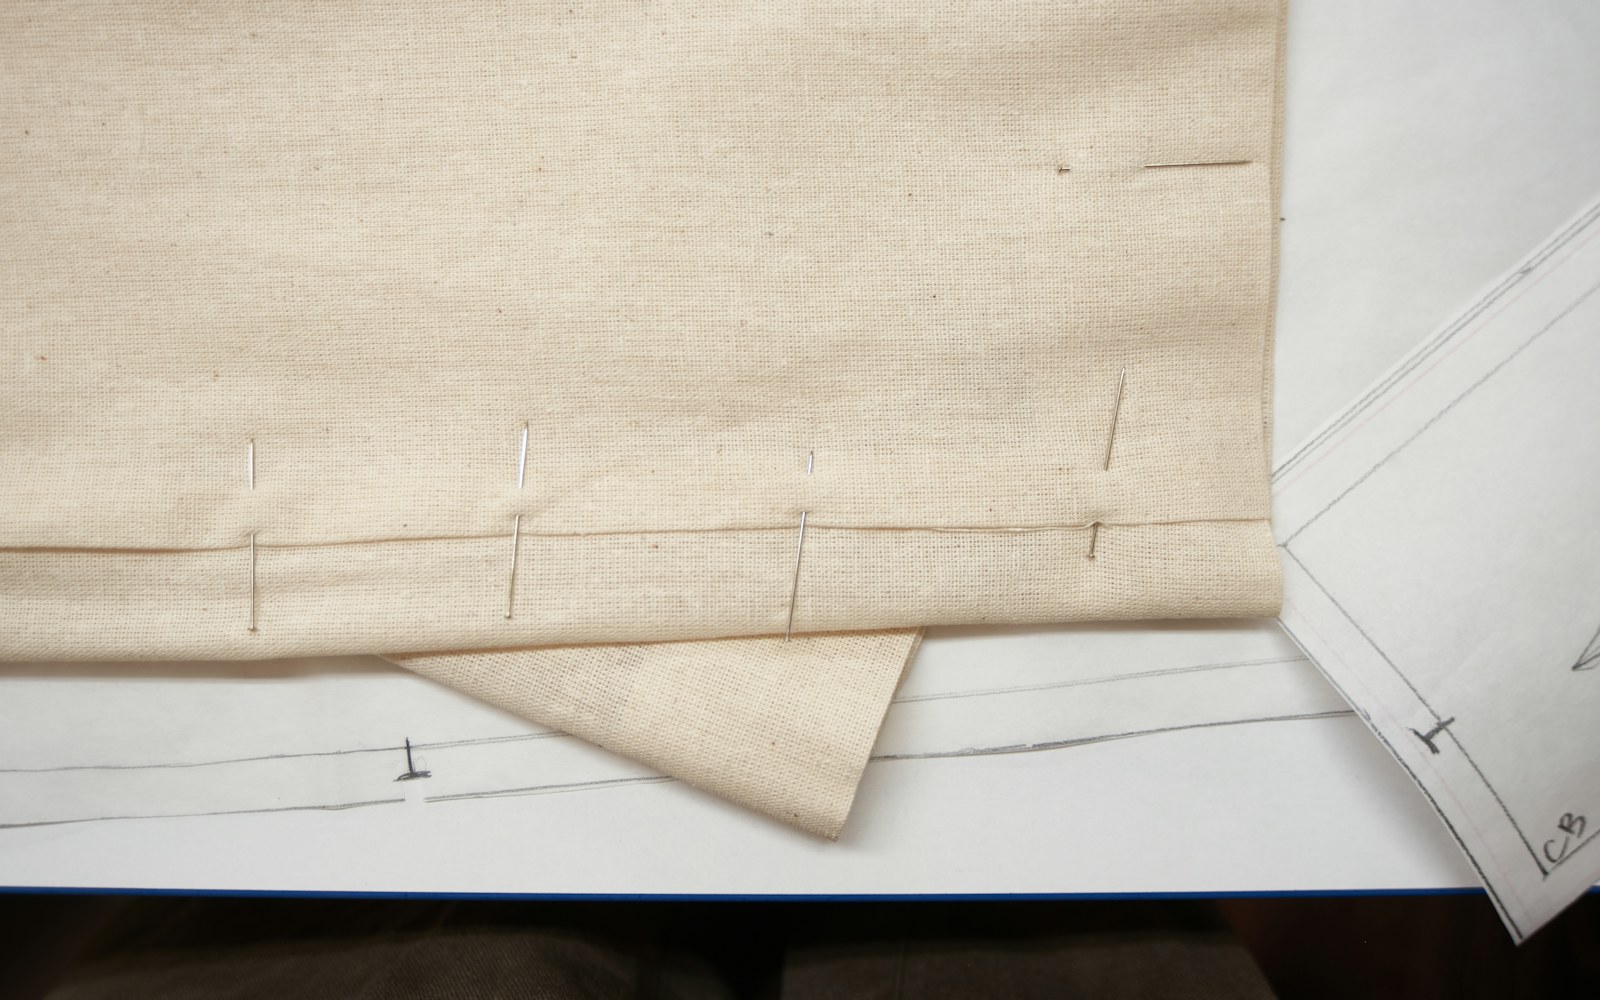
A maker wants to translate a complex historical or couture-inspired gown into doll scale, but standard human-garment drafting methods create bulky seams, distorted curves, and a poor fit around a sculpted body.
The most reliable route around those problems is to map the actual doll body, turn that map into small pattern sections, sew a fit-focused muslin, and make scale-specific changes before cutting the final cloth. Drafting doll clothes patterns is not simply human pattern cutting made smaller: a sculpted torso, fixed hands, prominent joints, and very short seam runs all change what can function—and what only needs to read visually.
A couture-scale gown succeeds when its silhouette, seam placement, and movement appear intentional from the viewing distance. Start with those priorities. Then let the muslin reveal where literal miniature construction needs to become an informed compromise.
Define the design logic before drafting doll clothes patterns
Before measuring, reduce the reference gown to its governing decisions. A historical image, runway look, or couture-inspired garment may contain many visible details, but not every one carries equal visual weight.
Identify the elements that establish its character:
- overall silhouette: column, bell, bustle, sheath, empire, or supported ball skirt;
- apparent waist position and bodice length;
- neckline and shoulder line;
- principal bodice divisions, such as princess panels, a pointed waist, or a contrasting yoke;
- sleeve volume and where it is concentrated;
- skirt support, fullness distribution, and hem shape;
- visible fastening logic, whether the garment appears to open at the back, side, or front.
Use these features to create an interpretation rather than a literal replica. A gown may seem to have numerous tiny seams, understructures, facings, and layered trims at full scale. On a doll, reproducing each layer can make the waist rigid, obscure the body’s proportions, or prevent dressing altogether.
Decide early which details must function and which can be implied. A pleated cuff might become a controlled strip of stitched folds. A densely boned bodice may become a lined panel with one or two strategically placed seams. Decorative buttons might be surface details while a concealed overlap provides the real closure.
Also establish the garment’s required range of use. A display-only gown for a fixed standing pose can tolerate a closer fit than one intended to accommodate raised arms, seated poses, or frequent changes. This is a design requirement, not a late-stage alteration.
Build a measurement and movement record
Take measurements on the doll as it will be dressed. If the figure will wear a shift, stockings, a petticoat, or a body covering beneath the gown, fit those layers first. At miniature scale, even a very thin underlayer can change the available circumference and alter how a bodice sits.
Record the following as a working set:
- neck circumference;
- high chest or bust circumference;
- waist and high-hip circumference;
- shoulder width and back width;
- armscye depth;
- front and back torso lengths;
- shoulder-to-waist length;
- arm length and wrist circumference;
- waist-to-floor or desired hem lengths;
- skirt length at center front, side, and center back where posture changes those measurements.
Add observations that a conventional block may miss. Note a sculpted bust, a sharply narrow waist, asymmetry, large shoulder joints, high hip contours, fixed hands, posed elbows, or any projection that a garment must pass over. Mark whether the body surface is painted, delicate, textured, or otherwise unsuitable for friction, adhesive contact, or repeated handling.
Photograph or sketch the doll from front, side, and back, then place measurement points and proposed grain directions on the images. This record becomes especially useful after the first muslin, when it is easy to forget whether a change addressed the body shape, the pose, or the behavior of the test fabric.
A padded working form can be useful for repeated fitting, but only if it preserves the essential body geometry. A generic miniature mannequin may help with construction, yet it cannot replace fitting on a distinctive sculpted body. Do not use a wrapped form if the process could abrade or transfer material to a sensitive surface.
Map seam lines directly on the body
For complex couture art doll clothing, tape mapping is often more useful than beginning with a scaled-down human bodice block. It starts with the volume that must be covered rather than assumptions about standard proportions.
Use low-tack tape, narrow paper strips, or a removable protective layer that is appropriate to the doll’s materials. Test any contact method in an inconspicuous area only when doing so is suitable for the object; no tape or adhesive approach is universally safe for every surface.
Map these lines first:
- center front and center back;
- neckline and waistline;
- side seam;
- shoulder seam;
- armhole;
- planned closure edge and overlap;
- major style lines, darts, or panel seams;
- sleeve seam and cuff position where relevant.
Keep each mapped section small enough to flatten. If tape buckles across the bust, around a shoulder joint, or over the high hip, do not force it smooth. That buckle is useful information: the surface needs a dart, a panel seam, gathering, easing, or another controlled release.
Before removing the map, mark balance points across every seam. Add grain arrows, top and bottom orientation, center-front or center-back placement, and the intended overlap edges. A few accurate marks save considerable confusion once small pieces are off the body.
Flattening the map into usable pattern pieces
Lift each section carefully and cut it apart along the intended seam lines. Lay it on paper and assess where it resists lying flat. Use the smallest opening cuts necessary to flatten it, then convert those openings into purposeful shaping:
- use darts for contained shaping over modest curves;
- use panels for pronounced torso contour or when a design line can carry the shaping;
- use gathers or pleats for skirt volume and controlled excess;
- use bias or shaped pieces only where their stretch or drape serves the design and can be tested.
Trace a clean paper version of each piece. True the adjoining seam lengths: curved seams may differ slightly in measured edge length depending on the seam path, but they should meet intentionally at the marked balance points. Check that shoulders, side seams, waist seams, and sleeve-to-armscye sections have a clear relationship before proceeding.
Establish the fit shape first. Add seam allowances only after the pattern pieces describe the intended body coverage. This order prevents seam allowance width from disguising a shape problem or creating misleading bulk in the first test.
Sew a doll gown muslin that tests the right things
A doll gown muslin is not a rough decorative mock-up. It is a fit instrument. Keep the seams that control shape, the proposed closure location, the sleeve-and-armscye relationship, and the major skirt support. Omit fragile trims, finished hems, embroidery, and other details that do not affect fit.
Add a consistent, workable seam allowance to each test piece after the fit pattern is established. The appropriate width depends on the fabric, the size of the piece, the seam’s stress level, and how securely it can be handled. Tiny allowances can be difficult to sew accurately; oversized ones can create false bulk. Choose an allowance that can be marked, stitched, and trimmed consistently.
Baste the muslin first. Use visible thread and avoid permanently finishing seams until the basic fit has been assessed. Install the intended type of opening in a simplified form: a back overlap, temporary thread loops, or a basted placket can reveal whether the garment can actually reach the body around hands, shoulders, and hips.
Check the muslin from front, side, and back. A gown that appears smooth from one preferred display angle can be visibly off balance in profile or at the closure.
Read drag lines as clues, not verdicts
Mark pulls and folds directly on the muslin while it is on the doll. Their direction can suggest a cause, but no one mark provides a complete diagnosis.
| What you see | Possible cause | First check |
|---|---|---|
| Horizontal pulling | Insufficient circumference, insufficient length over a curve, or a restrictive underlayer | Ease, seam length, and whether the bodice is being pulled up from elsewhere |
| Vertical folds or slack | Excess width, misplaced grain, or an imbalance in shaping | Grain line, side-seam position, and whether a dart is too open |
| Diagonal drag line | Imbalanced seam, dart, armscye, shoulder, or closure tension | Balance points, seam lengths, grain, and the origin of the strain |
| Neckline shifting | Shoulder imbalance, closure pull, excess length, or grain distortion | Center lines, shoulder seams, and the direction of the closure overlap |
| Bodice riding upward | Insufficient torso length, high-hip interference, or arm movement pulling the garment | Waist placement, underarm clearance, and the posed range |
Avoid enlarging every seam in response to a visible pull. That may remove the strain while also erasing the intended silhouette. Locate the direction and origin of the problem first. A horizontal pull at the front waist, for example, may be caused by a too-short front bodice, a tight high hip, a skirt seam that is catching, or an underlayer that has changed the fit.
Test the intended pose slowly. Raise the arms only as far as the finished gown is expected to allow. Check whether sleeves bind, the neckline rotates, the waist climbs, the skirt catches on a joint, or the opening strains over the hands. When several alterations interact, make a second muslin rather than attempting to solve everything on the final cloth.
Transfer every successful change back to the paper pattern. Mark the revision date and describe the reason for the change, such as “added length above waist,” “reduced back-neck gape,” or “moved side seam forward.” This distinguishes genuine fit corrections from temporary muslin adjustments.
Engineer construction for miniature scale
Once the muslin fits, choose construction methods according to fabric behavior, seam location, and handling needs. Scale garment construction works best when bulk is managed as deliberately as silhouette.
Seam allowances, hems, and intersections
Use consistent seam allowances, but do not assume a human-garment standard is appropriate. Evaluate each seam by asking:
- Can this allowance be stitched accurately?
- Will it sit smoothly on the doll’s body?
- Does the seam need strength for dressing or posing?
- Will several allowances meet at this point?
Reduce bulk selectively. Grade layered seam allowances so they do not end at the same edge. Trim only after confirming that the seam has enough stability for the fabric. At waist seams, underarms, collars, and closure edges, redistribute intersections where possible rather than allowing several thick layers to stack in one place.
A narrow hem may be suitable for a stable fine fabric. In other materials, a facing, lining turn, shaped hem band, or controlled raw-edge treatment may read more cleanly. Test the exact hem method on a scrap before committing to a full skirt.
Fabric direction matters at doll scale
Fine, soft fabrics often describe miniature curves more convincingly than thick, stiff, or heavily textured cloth. That does not make one fiber or weave universally correct: a structured gown may require body, while a fluid gown needs controlled drape. The important question is whether the cloth supports the planned silhouette without overwhelming the seam lines.
Test directional behavior on samples. Bias can soften a contour but may stretch during handling. Stripes can make a slight off-grain cut conspicuous. Nap changes color perception across panels. Large motifs can overpower a small figure even if the fabric itself is fine enough.
For skirts, test how the material responds to its support system. Fullness may need to be redistributed between side seams, back pleats, or a shaped underlayer. A skirt that hangs correctly on a flat work surface may behave differently over a sculpted hip or when the doll is placed in its intended stance.
Line only where lining earns its place
Lining is a construction layer, not an automatic sign of quality. It can clean an edge, control transparency, protect selected seam allowances, or provide a smooth interior. It can also double bulk, stiffen a small bodice, and restrict a sleeve.
Use a lining when it contributes a clear function. Consider omitting it where the outer fabric is already stable, where the garment needs flexibility, or where a narrow facing achieves the same visual result with less thickness. Test the outer fabric and lining together; materials that behave well separately can become unexpectedly rigid as a pair.
Draft sleeves around mobility and access
Sleeves should be drafted with the armscye, not treated as separate tubes attached at the end. Check armhole shape, sleeve-cap ease, underarm clearance, and the exact path the garment must take over the doll’s arms.
If a sleeve restricts posing, revise the armscye and sleeve together. Widening only the sleeve may add unattractive excess without solving the point of strain. A lower armscye may provide room but can also reduce arm lift and alter the bodice line. The best choice depends on the intended pose and silhouette.
For fixed hands or broad sculpted fingers, consider whether a sleeve needs an opening, a narrower cuff that closes after dressing, or a construction order that allows the bodice to be placed before the sleeves are completed. Never force a finished garment over a projection simply because it passed during a loose muslin test.
Choose closures before cutting fashion fabric
Closures determine access, bulk, and visual balance. Select one before final cutting and test it on the muslin or a construction sample.
- Back openings can be discreet and practical, but may interrupt a train or center-back design line.
- Side openings can preserve a back detail, though they may be harder to access on a narrow torso.
- Hooks and eyes are low-profile but require secure placement and may be challenging at very small scale.
- Snaps can be convenient but may create a visible bump or pull on delicate fabric.
- Thread loops and small buttons can suit period-inspired logic, provided the loop size and button scale remain convincing.
- Ties and concealed overlaps can be gentle and adjustable, though they need enough overlap to hold their position.
The closure should allow dressing without scraping painted surfaces, stressing joints, or pulling the gown out of alignment. Its choice is material- and body-dependent, particularly for dolls that will be handled or redressed.
Cut and construct with a repeatable record
Before cutting the final gown, make a small sample that includes the actual fashion fabric, lining or facing, seam finish, hem method, closure, and any gathered or pleated section. A sample is where to discover whether a fine fabric frays excessively, a pleat becomes too thick, or a closure distorts the edge.
Mark seam lines, notches, grain, and balance points precisely. On a miniature bodice, a small shift at the shoulder can change the neckline, sleeve pitch, and waist alignment at once.
Plan the construction sequence to preserve access for:
- pressing or finger-shaping seams where appropriate;
- trimming and grading seam allowances;
- inserting a lining or facing;
- attaching sleeves before openings become inaccessible;
- installing closures without catching interior layers;
- finishing hems and surface details last.
Use clean hands and controlled handling around delicate textiles and doll surfaces. Pressing, steaming, adhesives, and storage methods should be chosen cautiously according to the fibers, finishes, construction, condition of the doll, and any artist guidance. Do not assume that a technique suitable for one fabric or figure is safe for another.
Label every final pattern piece with:
- doll identifier and view;
- pattern piece name;
- cut quantity;
- grain direction;
- seam allowance;
- outer fabric and lining information;
- interfacing or support requirement, if any;
- closure location;
- revision date.
Store the pattern with a construction log containing measurements, pose notes, muslin changes, final alterations, fabric swatches, needle and stitch notes, closure details, and photographs of the completed fit. This record is what turns a successful one-off gown into a repeatable method.
Miniature Gown Fit-Test Checklist
- Measurements and intended pose recorded
- Underlayers fitted before measuring
- Seam map marked with grain and balance points
- Fit shape established before seam allowances are added
- Muslin basted with the planned opening or closure logic
- Front, side, and back assessed on the doll
- Drag lines marked and traced to their likely origin
- Arm, hand, joint, and projection clearance tested
- Waist, underarm, neckline, and closure bulk inspected
- Pattern revisions, swatches, and fit photographs logged
Troubleshooting a gown that still looks wrong
The waist or bodice looks bulky
First inspect where layers accumulate. A lined bodice, gathered skirt, waist seam, and closure overlap can create a dense ridge even when each element seems reasonable alone. Remove unnecessary layers, grade allowances, shift seam intersections, or place shaping in fewer, better-positioned panels. Reconsider whether a lining is doing useful work.
The neckline or armhole distorts
Check grain direction, shoulder balance, seam-length matching, and closure tension. A neckline can appear uneven because the bodice has twisted, not because the neckline curve itself is wrong. Confirm that center front and center back are where they should be before reshaping the edge.
The skirt will not hang as intended
Assess support, grain, hem behavior, fullness placement, and the doll’s hip shape together. A skirt may need less bulk at the side, more controlled fullness at the back, a different support layer, or a hem treatment that does not pull the edge inward. Test changes in the intended display stance rather than only on a flat surface.
The sleeves restrict posing
Return to the armscye and sleeve as a pair. Check whether the underarm is too high, the sleeve cap is imbalanced, the sleeve is pulling from the shoulder, or the garment is catching on a joint. Adding width only to the sleeve often creates excess without restoring movement.
The detail looks oversized
Replace literal miniature replication with a visual echo. Use narrower trim, stitched lines, shallow controlled gathering, a painted or embroidered suggestion, or a simplified seam placement. At doll scale, the design reads through proportion and rhythm more readily than through the exact number of components.
The pattern is difficult to repeat
Return to the record. Verify that seam allowances are consistent, balance points were transferred, grain lines are clear, and changes made for one fabric were not mistaken for universal fit corrections. A stable pattern separates body-fit information from fabric-specific adjustments such as added ease, altered hem support, or a different closure treatment.
The strongest couture-scale gowns preserve a reference garment’s visual logic while accepting the realities of a particular doll body. Map the form, test the fit-bearing structure in muslin, and let each revision clarify where miniature construction needs precision—and where it benefits from restraint.