Process
How to Add Hand Embroidery to Art Dolls Without Distorting the Surface
Stitch major motifs while pattern pieces are flat, then reserve finished-form embroidery for small, low-tension details that do not fight the doll’s seams, stuffing, or shape.

By Sophie Harrow
· 13 min read
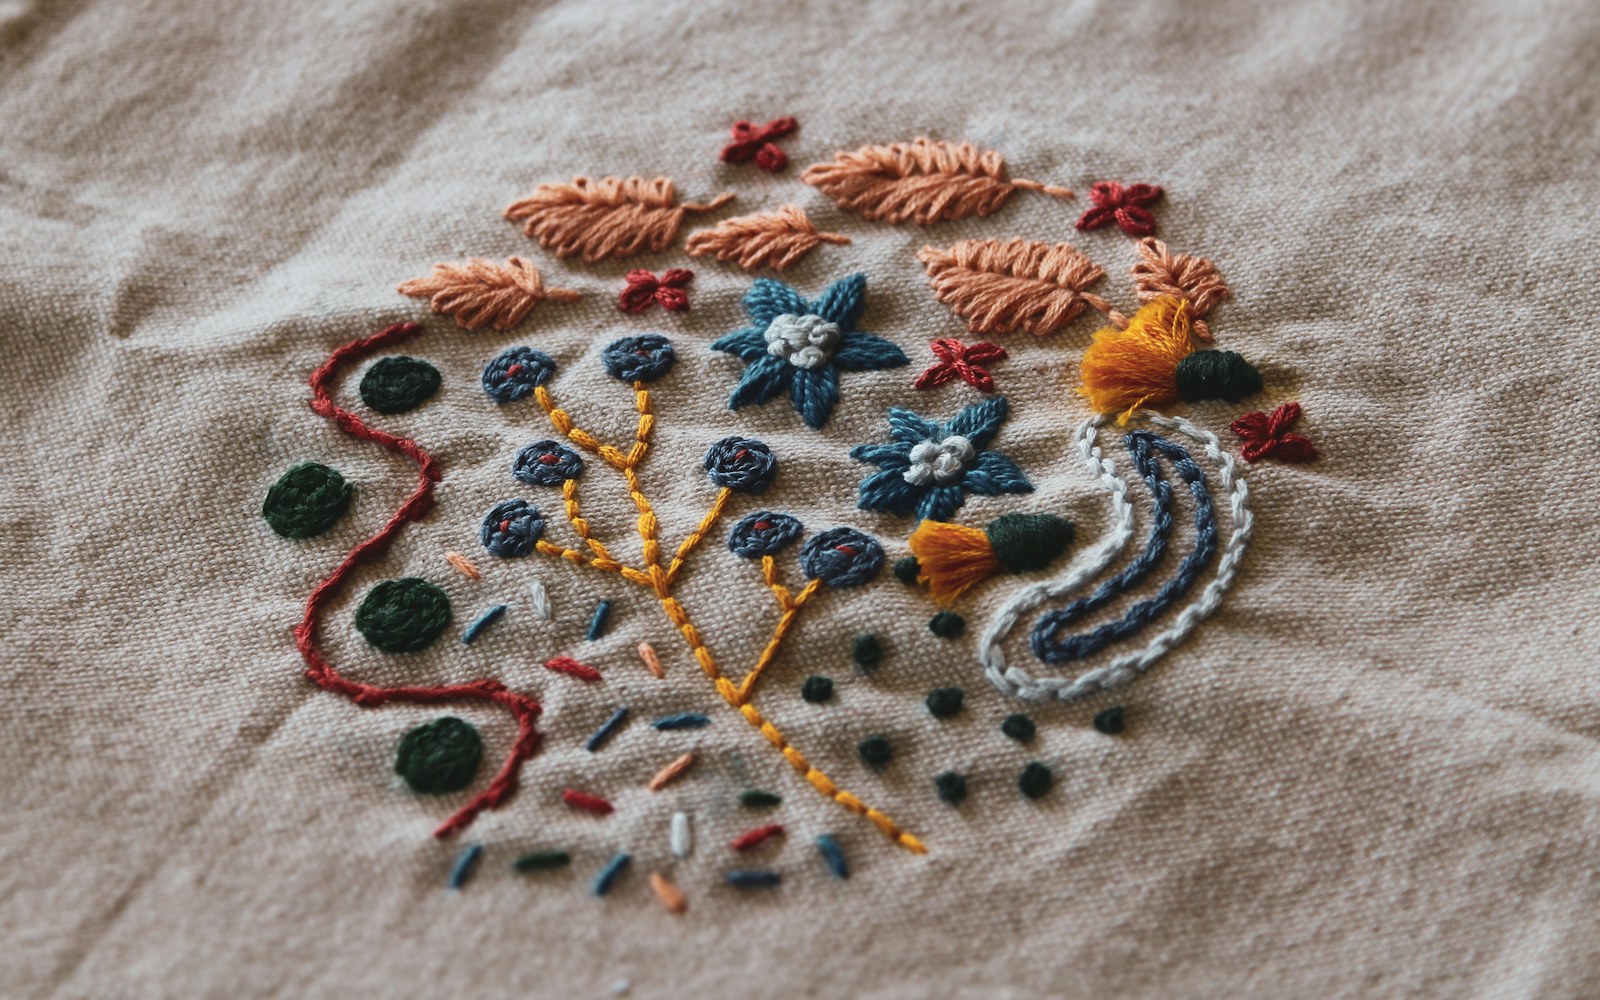
Makers want to add detailed stitched features, clothing decoration, or symbolic motifs to a handmade figure without puckering fabric, flattening stuffing, or making seams difficult to close. The lowest-risk approach is usually to embroider major or dense motifs on flat pattern pieces before sewing and stuffing, then reserve finished-form work for sparse, low-tension details. Support the fabric rather than tightening the thread, and test the exact combination of fabric, stuffing, thread, and motif before working on the doll itself.
Plan embroidery around the construction stage
Embroidery behaves differently on a flat panel than it does on a rounded, stuffed object. A motif that looks smooth before assembly may pull across a curve after stuffing; a detail that is easy to place on a finished face may be difficult to secure invisibly. Decide when to stitch before transferring the design.
Flat pattern pieces: best for most substantial motifs
Use flat pieces for large motifs, dense filling, repeated decoration, clothing panels, and details near a seam. This stage gives the most control over grain direction, backing, thread tension, and the reverse side of the work.
Flat embroidery is generally the better choice when a design:
- needs a hoop, frame, or firm hand support;
- includes satin stitch, long-and-short stitch, dense filling, or layered thread;
- sits close to a seam allowance or turning edge;
- must remain even across a broad area;
- will be difficult to reach once limbs, head, or torso pieces are joined.
Mark every seam allowance before placing the motif. Also mark turning openings, ladder-stitch closures, joint positions, and any area intended to bend or compress. A decorative border may be attractive near an edge, for example, but it can make turning a narrow limb difficult if it enters the seam allowance or creates a stiff patch at the curve.
Lightly stuffed but open: useful when volume controls placement
A lightly stuffed, unclosed form is a useful middle stage when the motif must follow the shape of the doll but access to the inside still matters. It can suit chest symbols, placement-sensitive facial marks, or a small design that needs to sit correctly across a curved head or torso.
Keep stuffing light enough that the fabric can be supported from inside without being stretched tight. Leave an opening large enough to inspect the reverse, manage tails, and adjust stuffing after the embroidery is complete. This method is less suitable for dense work, because repeated needle passes can drag fibres, compact filling, and distort the surface.
Fully assembled: reserve for sparse surface-led details
Finished-form embroidery can be appropriate for small facial lines, restrained symbolic marks, repairs, or isolated accents that do not require strong tension. It is often useful when exact placement depends on the completed silhouette.
Treat the finished doll as a limited-access surface. Avoid motifs that need a hoop, several passes through the same area, a broad backing patch, or heavy thread tension. Be especially cautious around joints, narrow limbs, tight curves, closure seams, and areas handled frequently.
A quick decision checklist
| Question | Flat pattern piece | Lightly stuffed, open form | Fully assembled doll |
|---|---|---|---|
| Is the motif large or densely stitched? | Best option | Sometimes possible | Usually avoid |
| Does placement depend on the finished volume? | Use a shaped test first | Often useful | Suitable for a small detail |
| Does it sit near a seam or turning edge? | Plan carefully before sewing | Usually avoid | Avoid |
| Does the work need a hoop or firm support? | Best option | Possible with care | Usually unsuitable |
| Is access to the reverse needed for neat ends or backing? | Easy | Available | Limited |
| Will the area bend, compress, or move at a joint? | Keep work minimal | Keep work minimal | Keep work minimal |
| Will the doll receive frequent handling? | Choose low-bulk stitching | Choose low-bulk stitching | Use sparse, secure details only |
A practical rule follows from these choices: if a motif needs tension, density, backing, or precise control of the reverse, embroider before final assembly. If it is small, sparse, and surface-led, it may be added after stuffing with careful support.
Build a compatible fabric, thread, needle, and backing system
Surface distortion is rarely caused by one choice alone. Fabric weave, grain, stuffing pressure, thread weight, needle size, stitch density, and support all work together.
What stabilizer, backing, and interfacing do
A stabilizer for embroidery is a support material used to reduce shifting and stretching while stitching. Some stabilizers are temporary and are removed after the work; others remain in place. A temporary backing can be useful while a flat panel is embroidered, especially if the fabric is loosely woven or prone to distortion.
Interfacing is generally a more permanent support layer applied to the fabric itself. It may help a soft fabric carry a small motif or reduce seam-area strain, but it can also change drape, add stiffness, and create edge bulk once the doll is turned and stuffed.
A permanent backing can remain inside the doll behind embroidery. It may be useful under a dense motif when the reverse will not need to stay supple. However, it can create a hard patch, show through light fabric, or crowd a narrow limb or tightly curved seam. Its edges need particular attention: a backing that extends into a seam allowance may make the seam uneven or difficult to close.
No support suits every construction. Test whether the selected material bends, turns, and stuffs in a way that is compatible with the planned form.
Match thread weight to the fabric and scale
Finer thread and lower stitch density generally add less bulk and pulling force than heavier thread or closely packed stitching. On a small doll, a thread that works well on a garment panel may appear raised or rigid on a cheek, finger, or narrow limb.
For delicate facial lines and curved areas, begin with a thread weight that can sit on the fabric rather than dominate it. For a bold decorative panel, a heavier thread may be appropriate if the panel is worked flat and the seam plan allows room for the added thickness.
Use shorter working lengths of thread when stitching on a stuffed form. This reduces abrasion and drag as thread passes through fabric and filling.
Choose a needle by testing the complete stack
Select a needle that passes cleanly through the fabric and any support layer without opening oversized holes. The right choice depends on the weave, the thread, the backing, and how densely stuffed the object will be.
Make a test with the intended needle, not only the thread. If the needle leaves visible punctures, catches fibres, or requires force, try another option before beginning the doll. A short needle can offer more control on a stuffed form, where long travel through the body increases the chance of catching filling or emerging in an unintended place.
Hooping alternatives for doll construction
A hoop is helpful only when it holds fabric smooth without crushing, marking, or permanently stretching it. Flat pattern pieces may be hooped conventionally if the hoop does not sit on seam allowances or distort the grain.
For very small pieces, support the fabric in the hand, use a small frame, or temporarily baste it to a larger sacrificial cloth for handling. For a finished form, avoid forcing the object into a hoop. If it cannot be supported gently from both sides, consider moving the detail to an earlier construction stage or simplifying the motif.
Choose stitches that preserve the sculptural surface
The most appropriate stitch is often the one that gives the required line or texture with the least bulk.
Low-bulk choices for faces, curves, and moving areas
Backstitch, split stitch, running stitch, and restrained couching can work well for facial features, contour lines, and small symbolic details. Their success depends on scale and tension, but they usually allow more flexibility than dense filling.
Keep stitch lengths proportionate to the curve. Long stitches spanning a rounded surface can bridge rather than follow the form, while very short, tightly pulled stitches can gather the fabric. On small curves, a sequence of short, relaxed stitches usually follows the contour more naturally.
Use minimal embroidery across joint lines, elbows, knees, necks, and other areas expected to compress or bend. Even a simple line can become stressed if it crosses a point of repeated movement.
Dense and raised stitches need more planning
Satin stitch, French knots, long-and-short stitch, beadwork, layered motifs, and dense filling can create rich surfaces, but they add local weight, stiffness, snag points, and thickness. They are best treated as structural choices rather than last-minute decoration.
Advanced long-and-short stitch work is usually safer on a supported flat panel. Keep it away from turning edges and seam allowances, and test whether dense colour blending still permits smooth turning and even stuffing. A motif may look flexible while flat yet resist the compression needed to turn a narrow doll part right side out.
French knots and other raised details can catch during handling. Use them selectively on faces, clothing, or display-oriented surfaces, and consider whether they will be pressed against another part of the doll during storage or posing.
Stitch without puckering, thread drag, or stuffing damage
Begin with an accurate swatch
A useful swatch repeats the actual conditions of the doll: the same fabric, grain direction, backing or interfacing, thread, needle, and approximate stuffing pressure. If the finished motif will sit across a curve, sew and stuff the swatch into a comparable shape rather than judging it only while flat.
This test can reveal whether the fabric gathers, whether the backing feels too stiff, whether thread colour changes against stretched fabric, and whether the motif shifts after volume is added.
Transfer the design lightly
Trace or baste the motif before stitching. Choose a marking method that is faint, removable where appropriate, and unlikely to remain visible around stitches. Heavy marking can be difficult to conceal on pale fabric or around sparse line work.
Basting is particularly useful for broad placement marks, seam boundaries, or designs that need to align across multiple pattern pieces. Remove temporary threads carefully so they do not pull newly worked stitches.
Support fabric; do not pull stitches tight
Keep the fabric smooth and supported, but do not stretch it hard. Pull each stitch only until it lies flat against the surface. A stitch pulled beyond that point can draw the weave inward and create puckering that becomes more obvious after stuffing.
For a larger motif, working from the centre outward can help distribute tension. Pause regularly, turn the work over, and check for loops, knots, long floats, or drawn threads on the reverse. Problems are easier to correct before they are enclosed inside a body part.
Work carefully on stuffed forms
When stitching on a stuffed doll, make controlled, short stitch paths. Support the fabric with a finger or a small tool from the opposite side where possible, and avoid repeated deep passes through the same zone.
If the needle catches stuffing, or the thread begins to drag fibres through the weave, stop rather than forcing it. Pulling harder can compact filling, create a dent, or distort the surface. The better solution may be to open a seam for access, redistribute the stuffing, move the motif, or reduce it to a lighter line-based detail.
Finish securely without creating lumps
Secure starts and ends with small anchoring stitches in a seam allowance, on the backing, or on the inside of an open form where possible. Large knots can create visible bumps on a smooth face or torso and may interfere with stuffing.
Keep thread tails short and contained after securing them. Long internal floats can catch on stuffing or migrate through a loose weave over time. Before closing any seam, inspect the interior for backing edges, tails, knots, and dense stitch clusters that could obstruct turning, stuffing, or ladder stitching.
For post-assembly embroidery, burying thread ends within the form can be useful only when the stitch path can be made without pulling the surface or dragging stuffing. If the fabric is delicate, loosely woven, or tightly stuffed, a discreet exterior anchoring method may be less disruptive than repeatedly passing through the body.
Beads and raised surfaces
Bead embroidery needs separate planning because each attachment point adds weight and potential abrasion. Reinforce the attachment area when the fabric and construction allow it, and avoid beads at joints, tight curves, closure lines, or surfaces that rub against other parts of the doll.
Consider the intended handling. A raised beaded collar may be workable on a display piece, while a heavily handled doll may need flatter, more protected decoration. Beads and dense raised stitches can snag, compress, or loosen depending on their attachment, the underlying fabric, and use.
Troubleshoot common surface problems
Puckering
Puckering usually points to too much thread tension, too much stitch density for the fabric, inadequate support, or an unsuitable stitch direction.
- Stop pulling stitches tight; aim for contact, not compression.
- Reduce density or break a large filled area into lighter elements.
- Try a compatible temporary support or permanent backing on a swatch.
- Work smaller sections and reassess the surface frequently.
- Check whether the motif is fighting the fabric grain or a strong curve.
Flattened or uneven stuffing
Dense stitching on a filled body can compress stuffing, especially when the same area is pierced repeatedly.
- Move dense motifs to the flat stage where possible.
- Use a short needle and controlled paths for finished-form details.
- Avoid repeatedly passing thread through the same stuffed zone.
- Pause if filling catches, then redistribute it through an open seam if access remains.
- Consider whether a lightly stuffed, open stage offers the placement you need without final-form pressure.
Visible backing or hard patches
Backing can become apparent through thin fabric or create a noticeable change in softness.
- Test a lighter support, a smaller backing area, or lower stitch coverage.
- Keep backing clear of seam allowances and turning points unless the pattern has been designed to accommodate it.
- Trim only after confirming how much support the embroidery and seam construction still need.
- Where possible, place the motif on a flat panel that can tolerate the added layer.
Seams that will not close cleanly
A difficult closure often means embroidery, backing, or thread tails have entered an area that needs flexibility.
- Keep stitching out of seam allowances and ladder-stitch zones.
- Reduce layers near narrow turning points.
- Check the intended closure before committing to a border or dense edge motif.
- If the design must sit near a seam, leave a deliberate unembroidered margin.
Thread snagging and loose ends
Snagging can result from long thread lengths, rough passage through filling, exposed interior floats, or insufficiently anchored ends.
- Work with shorter thread lengths.
- Inspect the reverse often and address loops before continuing.
- Secure starts and ends deliberately rather than relying on a large knot.
- Avoid long exposed floats inside a loosely woven or heavily stuffed piece.
Design distortion after stuffing
A flat design can spread, compress, or shift once the panel becomes a rounded form.
- Make a shaped swatch and stuff it to a similar firmness.
- Allow room for expansion across broad curves.
- Simplify designs that depend on exact geometry over a strongly rounded area.
- Place rigid motifs on flatter zones or separate clothing panels when possible.
Record a successful setup
Documentation turns a one-off solution into a repeatable method. Record the fabric type and grain direction, the support material used, needle and thread choices, stitch types, motif placement, and whether the work happened flat, lightly stuffed, or after final assembly.
Keep a labelled swatch or photograph both the flat and stuffed stages. Note how the surface changed after turning and stuffing, whether the backing affected flexibility, and any handling limits for raised stitches, beads, dense filling, or delicate thread.
The goal is not to make every embroidered doll behave the same way. It is to build a process that respects the specific fabric, form, stuffing pressure, and intended use of the object. When the embroidery needs control and density, work it before assembly. When the detail is small and lightly drawn across the surface, add it later only with enough support and access to keep the form intact.