Process
Needle-Felted Doll Faces: How to Sculpt Features Without Weak Spots
A structural approach to sculpting wool doll faces that stay coherent through handling, finishing, and attachment to the body.

By Sophie Harrow
· 11 min read
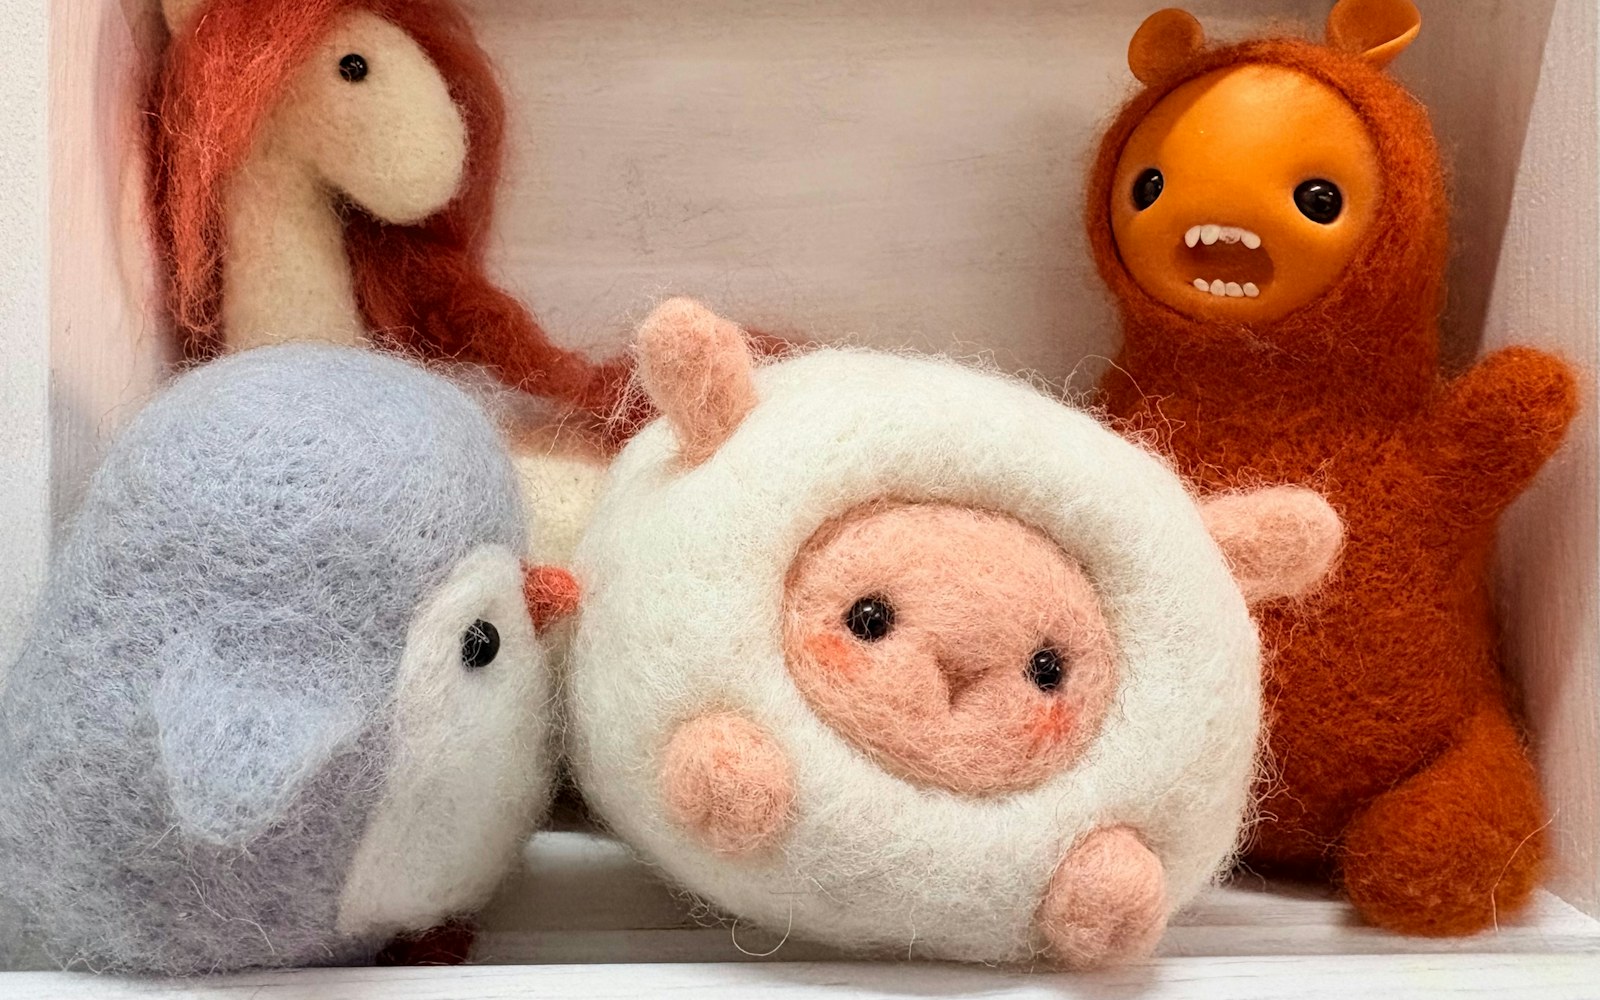
Makers need a reliable way to sculpt expressive wool faces for handmade dolls while avoiding loose features, lumpy surfaces, and fragile areas around the nose, chin, and eye sockets. The dependable solution is structural: build a dense, symmetrical head first, then form the face with small, thin layers whose loose fibers are felted well past their edges into that base.
A needle-felted doll face is not decoration applied to a finished head. It is a set of connected planes in the same wool structure. Features become weak when they are too thick, too separate from the head, or stabbed deeply into an under-felted base. Work slowly, check the head from several angles, and make each addition earn its place before adding the next.
Build a head that can support sculpted features
Start by giving different wools different jobs. A coarser, readily compacting wool is useful for the internal mass of a wool felt doll head. Reserve finer wool for the visible skin layer, subtle corrections, and small facial additions. Exact behavior varies among breeds, blends, batts, and suppliers, so test unfamiliar wool before committing to a face.
Build the head slightly larger than the intended finished size. Continued felting compresses wool and reduces volume. Aim first for an even oval or round form, depending on the character, rather than attempting a nose or cheeks immediately.
Use a coarse needle for early mass building, working with straight, controlled strokes into a suitable felting surface. Rotate the head often. Check it from the front, profile, top, and underside. A head that is nearly symmetrical before feature work is far easier to refine than one that must be corrected after the face is in place.
Before adding detail, compact the zones that will carry the most handling and visual definition:
- the central face where the nose bridge will sit
- the lower face where the chin will project
- the brow and eye area
- the underside of the jaw and the future neck connection
The head does not need to be rock-hard. It should, however, resist gentle thumb pressure without collapsing or feeling hollow. If a thumb leaves a deep dent easily, keep firming the base. A soft core allows features to drift, sink, or pull away later.
Map the face before adding volume
Once the head has an even, firm base, establish guide marks. A removable center line helps identify whether the nose, mouth area, and chin are leaning. Add light horizontal guides for the eyes, base of the nose, and mouth or chin zone.
These marks are not universal facial proportions. Doll styles may be elongated, rounded, simplified, animal-like, childlike, or deliberately abstract. Their purpose is consistency: they help you compare one side of your own design with the other.
Check alignment from more than the front. A nose can appear centered head-on while sitting too high, too low, or too far forward in profile. Likewise, a mouth plane can be level from the front but project unevenly on one side.
Think in shallow facial planes rather than separate parts:
- brow and forehead
- eye sockets and their surrounding planes
- cheeks
- nose bridge and nose tip
- muzzle or mouth plane
- chin
This approach prevents the familiar pasted-on effect. It also keeps the face easier to alter. Expression usually emerges from small changes to eyelid depth, cheek height, mouth line, and chin projection, not from attaching larger feature shapes.
Build features in thin, integrated layers
For every addition, pull off a wispy length of wool and leave its attachment edge loose. The loose fibers are essential: they are the bridge between the added feature and the head. A tightly rolled pellet may look convenient, but it tends to create a visible seam and can remain a separate pad under the surface.
Lay the wool across a broad enough area of the head, then felt around the perimeter first. Work the loose fibers into the base with a medium needle before tightening the feature’s center. This sequence helps fibers migrate across the join and reduces lifting edges.
Shape a felted doll nose from the bridge outward
Begin with a low, narrow nose bridge made from a thin strip of wool. Anchor it gradually from between the brows toward the center of the face. Keep its sides blended into the surrounding planes rather than sharply outlined at the start.
Add a very small amount of wool for the nose tip only after the bridge is secure. At a small scale, a simple rounded tip may read more clearly and remain more stable than deeply defined nostrils. If the doll is large enough to support more detail, add it in minute layers, checking the profile after each one.
Avoid repeatedly driving the needle into the exact center of the nose. Dense stabbing in one small point can create a hard, pitted area and may distort the opposite side of the head. Work around the sides and base of the nose to establish its transition, then use minimal finishing strokes at the tip.
Build cheeks and chin as broad planes
Cheeks are usually more convincing when made with thin, broad veils of wool than with compact balls. Place each layer so it overlaps the surrounding face, then felt the outer edges into the head. Compare both cheeks in front view and profile before building more volume.
Use the same method for the chin. Add a shallow layer across the lower face first, then increase projection only in small increments. A chin that is too dense or too abruptly attached can make the lower face look lumpy and can create a weak visual line at its edge.
If one cheek or side of the chin looks low, do not automatically enlarge both sides. First identify whether the problem is placement, projection, or a shallow transition. A restrained addition to the lower or flatter side often preserves the original character more effectively.
Make eye sockets through compression, not excavation
Eye sockets need not be deep holes. Create them as controlled shallow depressions with slightly raised or angled surrounding planes. Compress the intended socket area gradually, then build the brow, upper lid, lower lid, or cheek plane around it with very thin wool.
Trying to remove a large amount of wool from a finished head can weaken the face and produce ragged edges. It is generally safer to shape the illusion of depth through surrounding structure. For tiny dolls, even a slight shadowed recess or a change in plane may be enough.
Choose needles by stage, not by a single number
Needle labels and performance vary by supplier and needle style. Rather than relying on one gauge as a universal rule, match relative coarseness to the job at hand and test on spare wool.
| Stage | Useful needle approach | What to watch for |
|---|---|---|
| Core building | Coarser needle | Rapid compaction, but avoid roughing the visible surface unnecessarily. |
| Joining and initial feature shaping | Medium needle | Anchor loose attachment fibers across a broad perimeter. |
| Surface blending and tiny corrections | Fine needle | Use light, controlled work to reduce fuzz and blend seams. |
A coarse needle can speed up core construction, but it may leave a rougher surface if used aggressively near the finish. A medium needle is often useful for integrating cheeks, chin layers, and the early form of a nose. A fine needle is best saved for smoothing, shallow adjustments, and small surface veils.
Use straight entries and exits whenever possible. Angled stabbing can bend or break needles and can drag fibers in unintended directions. Inspect needles before use; replace bent or damaged ones. Keep fingers out of the needle path, and work on a stable pad or other suitable felting surface.
Know when the face is firm enough
A durable face is not simply one that feels hard. It needs consistent density and integrated transitions.
Try this simple firmness test before proceeding to hair, clothing, or decoration:
Feature-security test
- Press the head gently with your thumb. It should resist pressure rather than collapse or feel hollow.
- Touch each feature edge. No edge should lift, shift, or feel like a separate pad.
- View the face from front, both profiles, above, and below. The planes should read coherently from every angle.
- Look across the surface in side light. Check for abrupt join lines, pits, and fuzzy areas that need blending.
- Compare density on both sides of the face. A visibly softer cheek or eye area may change shape more easily in handling.
- Hold the head at the neck connection. It should not wobble or hinge at a narrow attachment point.
Good integration improves resistance to ordinary handling, but it does not make a wool face indestructible. Feature size, wool preparation, density, join quality, handling, and the eventual neck and body construction all affect durability.
Avoid lumps, join lines, and over-felting
If the face begins to look lumpy, stop adding volume. More wool can disguise a problem temporarily while making the silhouette heavier and the surface harder to correct. Instead, identify the transition causing the lump and blend it with a thin veil of matching wool.
Work the transition zone before the highest point of a feature. On a cheek, for example, felt the outer edge into the face, then refine the center only enough to hold the intended projection. On a nose, secure both sides of the bridge before sharpening the tip.
Deep punctures are another common problem. They can occur when a maker continues using a coarse needle after the surface is already compact or works too deeply into a small feature. Switch to a finer needle and add a very light surface layer, felting from the outside inward with shallow, even strokes.
Watch for over-felting. A surface that becomes hard, pitted, shiny-looking, or reluctant to accept new wool may have been compacted beyond the point where subtle additions blend easily. Significant over-felting and deep structural distortion are not always fully reversible. In some cases, rebuilding the affected surface plane with fresh wool is more effective than repeatedly stabbing the damaged spot.
Repair loose features, pits, and cracking
A loose nose, chin, or cheek should not be repaired simply by stabbing its existing center harder. That often compacts the feature while leaving the weak join untouched.
Loose feature
Add fresh, matching loose wool so it overlaps both the feature and the head. Felt these bridging fibers across the edge, concentrating on the perimeter first. Once the seam no longer lifts, refine the feature’s center and profile.
Shallow pit or needle hole
Lay a thin veil of wool over the depression. Felt it gently from the outside edges inward, allowing the layer to merge with the surrounding surface. Avoid filling the pit with a compact ball, which may produce a new bump.
Crooked nose or uneven cheeks
Return to the center line and assess the face in profile. Decide whether the issue is lateral placement, height, or forward projection. Correct the lower, flatter, or shallower side with the smallest addition needed, then reassess. Enlarging both sides repeatedly can quickly make a face too broad.
Cracking or splitting
Felted doll face cracking or splitting may appear where an under-felted core meets a dense addition, where thick features were forced onto a finished surface, or where one small area received repeated deep stabbing. First assess whether the split is superficial or reflects a weak underlying plane.
For a shallow split, bridge the area with a thin layer of loose wool extending beyond both sides of the crack. Felt the new fibers into the surrounding plane rather than only into the line itself. If the area is deeply compacted, badly misshapen, or structurally weak beneath the surface, the repair may remain visible or require rebuilding more of that facial plane. No repair method can guarantee that a heavily stressed area will behave like untouched wool.
Attach the head without stressing the neck
Complete face sculpting before attaching hair, head coverings, or clothing. These elements can hide asymmetry, catch on loose fibers, and make later repairs more difficult.
A well-made face can still be compromised by a narrow, weak neck. For a soft-sculpture body, extend wool through the neck area and felt it securely into both the head and body structure. Aim for a broad, gradual connection rather than a surface-only join that leaves the head able to wobble.
Test the attachment before adding costume weight. Hold the body gently and support the head. The neck should feel continuous with the form, not like a small hinge carrying a heavy sphere. If movement is noticeable, add and integrate more wool around the neck transition before proceeding.
Quick troubleshooting checklist
- Loose feature: Add bridging fibers across the join and felt the perimeter before the center.
- Lumpy cheek or chin: Blend the visual edge with a thin surface layer; do not add another dense wad.
- Crooked nose: Check the center line and profile, then make the smallest correction needed.
- Deep needle holes: Use a finer needle and a light veil of wool to soften the area.
- Face too hard to refine: Stop stabbing the same spot. Assess whether a new thin surface layer can restore a workable transition.
- Uneven eye sockets: Adjust the shallower or lower side cautiously instead of deepening both sockets by default.
- Head wobbles on the body: Reinforce the neck with integrated wool before adding hair, clothing, or accessories.
Finish only when the structure reads clearly
Before styling the doll, give the face one final inspection in neutral light. The nose, cheeks, eye area, and chin should read as connected planes; the profile should be intentional; and the surface should feel firm without becoming excessively hard or pitted.
A successful needle-felted doll face retains a little flexibility in its making process because expression is built through incremental changes. The key is to keep every change thin, broad enough to integrate, and supported by a dense head beneath it. That construction logic produces cleaner forms and gives the finished doll a better chance of withstanding careful handling over time.