Materials
Needle-Felted Figures: How to Make Tiny Details Hold Their Shape
Firm cores, controlled compaction, and properly anchored joins help small needle-felted details stay expressive without becoming hard or fragile.

By Mateo Ellis
· 9 min read

Small needle-felted figures often develop loose surfaces, weak projections, uneven proportions, or details that detach during handling. The direct solution is structural: build a compact wool armature, add detail in controlled layers, and anchor every vulnerable join through a substantial base. Fine fibres placed only on the surface may look convincing, but they cannot reliably support ears, tongues, paws, tails, fur texture, or miniature accessories by themselves.
The aim is not to make the figure hard. A successful small sculpture can remain soft to the touch while resisting light pressure and keeping its silhouette. How firm it becomes depends on the wool, needle, scale, and number of passes, so treat the process as a gradual adjustment rather than a fixed recipe.
Start with a firm, workable core
Use coarse or relatively loose core wool to establish volume, pose, and the main proportions. This material is useful for a wool armature because its fibres can interlock as you work, creating a stable mass without requiring a large amount of fine surface wool. Fine wool is better reserved for colour, smoothing, facial accents, fur direction, and small decorative elements.
Begin with the largest forms: body, head, muzzle, limbs, and any major tail or support. Check the figure from the front, side, and top before adding delicate features. At small scale, a slight change in the head-to-body ratio can make ears appear oversized or make paws disappear into the silhouette. It is easier to correct the core than to rebuild a finished surface.
Keep vulnerable details in mind while shaping the body. If an ear will be attached later, leave enough head volume for the base to disappear into. If a tongue or paw will project from the body, plan a receiving area rather than treating it as an afterthought. Miniature textile sculpture rewards construction planning because there is little material to spare at the join.
Compact the form before refining it
Repeated needle passes lock wool fibres together and reduce movement within the form. Work the needle into the mass rather than dragging it sideways across the surface. Rotate the figure frequently so that fibres compact from several angles. Concentrating on one face can flatten it, create a hard spot, or pull the silhouette out of balance.
As a broad guide, a coarser needle is often useful for bringing a loose core into shape, a medium needle for firming and refining, and a finer needle for surface work. Needle numbering and behaviour vary by manufacturer and tool design, so use the response of the wool as your guide rather than relying on the number alone. A coarse tool may leave visible holes or disturb a delicate surface; a fine tool may take longer to compact a loose mass.
A workable core should resist light pressure, retain its outline after gentle repositioning, and avoid shedding obvious loose tufts when handled carefully. It does not need to feel rigid. If you cannot make a shallow indentation without the whole form shifting, continue compacting in short passes. If the surface becomes hard before the proportions are correct, stop and reshape adjacent areas rather than forcing more needle work into the same spot.
Over-felting has its own problems. Excessive concentrated passes can produce a dense, distorted area that is difficult to blend with new wool. It can also remove the soft transition needed between a face and its muzzle, or between a paw and a leg. Compact gradually, pause to inspect the silhouette, and leave enough workable surface for later layers.
Build projections and delicate parts to survive handling
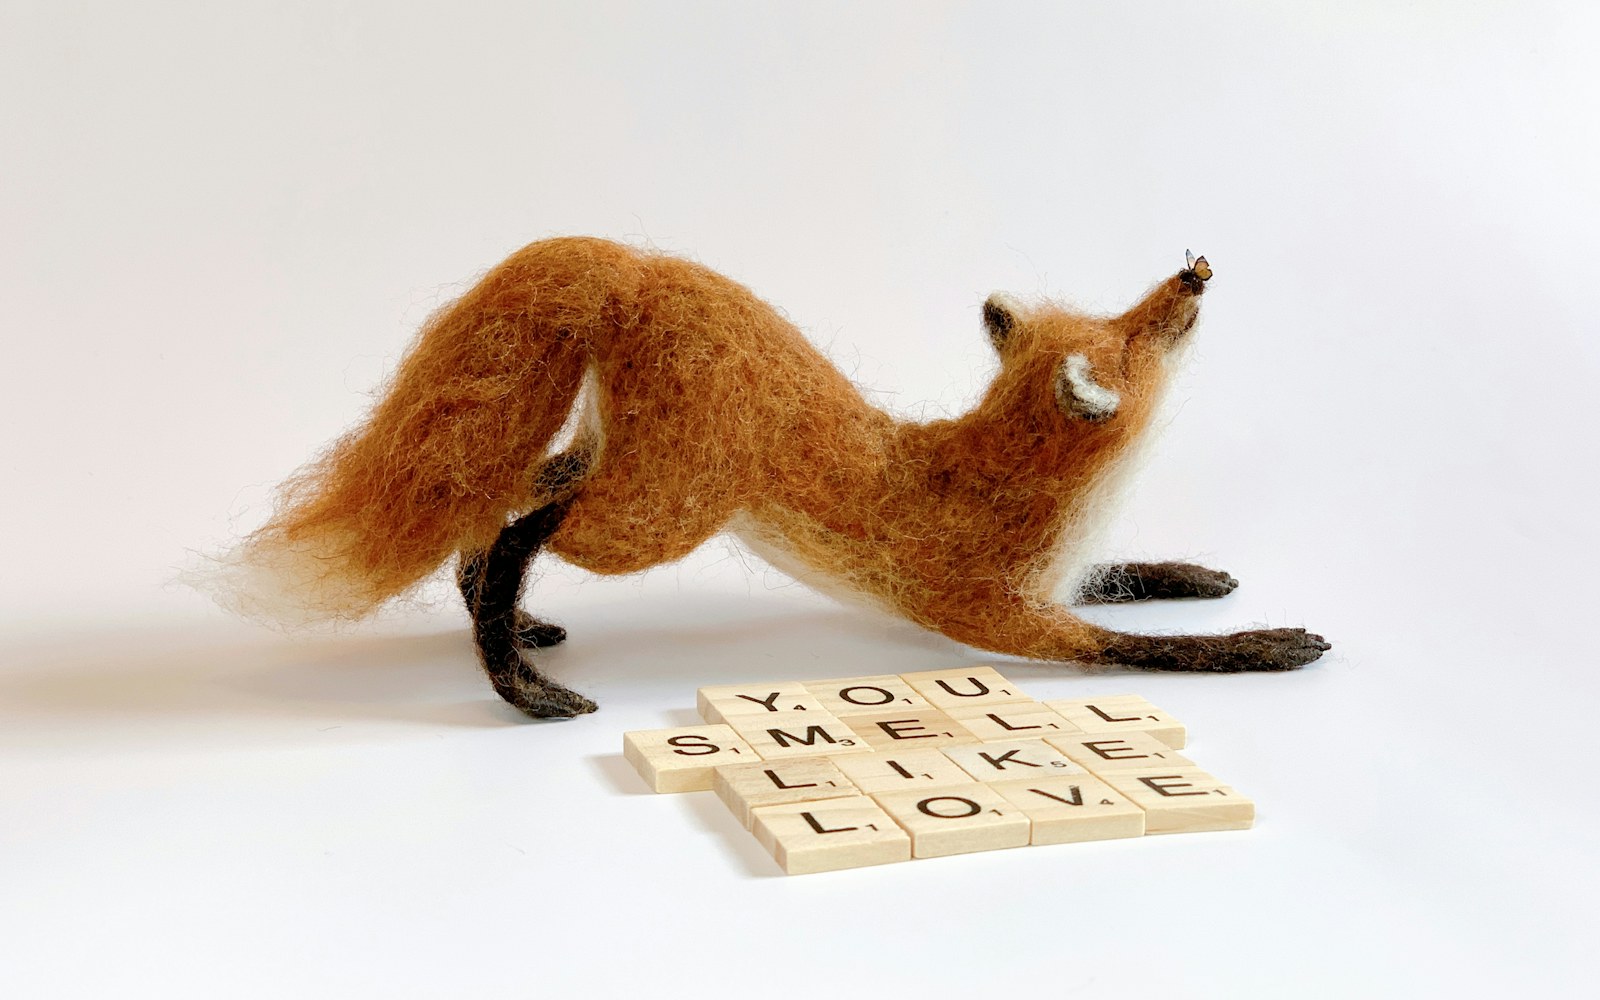
Whether to sculpt a feature directly into the body or make it separately depends on its size, shape, and position. Embedded details can be appropriate for shallow muzzle planes, small paw pads, and subtle raised markings. Separate parts are usually easier to control for ears, tails, tongues, prominent paws, and miniature accessories.
Making and attaching separate parts
Felt the separate piece until it has the intended outline and enough density to resist bending. Do not finish the entire surface if it will be attached. Leave a loose wool tail, roughened base, or uncompressed joining area. This gives the fibres somewhere to interlock with the body.
Position the part before committing to the join. Check its height, angle, thickness, and relationship to the matching feature on the other side. Then needle through the base and into the body from several directions. Work around the join rather than repeatedly stabbing one point. The aim is to spread the attachment through a small area of structure, not to create a single deep puncture.
Once the part is stable, add a thin layer of wool over the seam if necessary. Blend only the transition. Covering too much can erase an ear edge, soften an expressive mouth, or make a paw appear fused to the limb. A join can be visually smooth without being buried under a thick layer.
Embedding small details
For an embedded feature, add a small amount of wool in stages. Anchor its outer edges first, then refine the centre. This prevents a loose tuft from shifting as you work and helps preserve the intended boundary. It is particularly useful for tiny tongues, cheek planes, paw divisions, and raised fur markings.
Small projections fail most often at their base. If an ear bends, thicken or widen the hidden base before adding more surface colour. If a tail is too long to support its own weight, shorten it, increase its core, or add an internal support if the design and materials allow. A projection that is proportionally modest will usually survive handling better than one that is long, thin, and attached to a shallow surface.
The same principle applies to miniature accessories. A hat, collar, bag, ornament, or other textile element needs a stable contact area. Where possible, build a small felted pad or thicker attachment point beneath it rather than relying on a few loose surface fibres. Keep the accessory in proportion to the figure: an oversized detail may look appealing at first but can dominate the expression and place unnecessary stress on its join.
Add surface detail without loosening the structure
Apply fine surface wool sparingly over a compact base. Thin overlapping wisps are easier to control than one thick layer, and they allow the underlying form to remain legible. Anchor the fibres with shallow, controlled passes, following the direction in which you want the surface to read.
For felted animal figures, surface direction can suggest a muzzle, brow, cheek, chest, or paw without adding much material. Use short passes for small planes and longer directional passes where the fur pattern needs to flow. Avoid repeatedly stabbing the same point while trying to create texture; this can compact a small patch too aggressively and make the surrounding fibres look loose by comparison.
Facial details need a particularly light touch. Establish the head and muzzle first, then add colour and small raised accents. Check the expression from several angles because a feature that appears centred from the front may sit too high or too far forward in profile. If one eye, ear, or paw appears larger, correct the underlying structure where possible rather than disguising the difference with more surface wool.
Fur texture should not be used to compensate for a weak core. If fibres lift when you change the figure’s position, anchor the loose area into the structure with small wisps. If a bald spot exposes a smooth, dense core, patch it with a thin layer extending slightly beyond the visible gap, then blend the edges. A thick patch can become a new lump.
Troubleshoot common failures
| Symptom | Likely construction issue | Next move |
|---|---|---|
| Loose surface | Fibres are insufficiently anchored or have been applied in one thick layer | Add thin overlapping wisps and needle them into the core at varied angles |
| Bald spot | The core is too smooth, exposed, or unevenly covered | Add a thin patch that extends beyond the gap and blend its edges |
| Lumpy form | Core density is uneven or extra wool has been added to a high area | Identify the high point, compact it gradually, and add fibre only where volume is missing |
| Detached detail | The join is smooth, shallow, or covered before it has stabilised | Expose or create a rough joining area and needle through the base from several directions |
| Weak or bent projection | The feature is too long, too thin, or supported by too little material | Reinforce the base, shorten the projection, or thicken its hidden core |
| Over-felted area | Too many concentrated passes have made a hard or distorted patch | Stop compacting, reshape neighbouring areas, and blend with a thin surface layer |
When repairing a detached part, remove unstable fibres if they prevent the base from contacting the body. Reposition the feature and test its angle before adding colour. If the original base is too smooth, roughen it by loosening a small amount of fibre or add a new wool tail. Reattach from multiple directions, then give the join time for several light passes rather than trying to secure it with force.
For a lumpy form, resist the instinct to cover the low area immediately. First determine whether the surrounding area is simply too high. Compacting the high area may restore the silhouette with less material and preserve the figure’s scale. Add wool only after the outline has been checked from more than one view.
Handle and display the finished figure carefully
Support the body when moving a finished figure. Do not lift it by the ears, tail, tongue, fur, paws, or accessories, even when a join feels firm. Repeated friction and sideways pressure can loosen fibres that withstand a single gentle touch.
Choose a clean, dry display area away from crushing, snagging, and high-contact locations. Avoid arrangements in which a projecting detail can catch on fabric, foliage, packaging, or another object. Dust protection can reduce surface accumulation: a suitable cover or enclosed case may help, provided it does not press against the figure or trap it against a hard surface.
These measures reduce risk rather than guaranteeing preservation. Felted details remain vulnerable to compression, friction, repeated handling, and environmental changes. Wool behaviour can also vary with construction, fibre type, scale, and the condition of the object. Follow any specific care guidance supplied with the figure, and inspect it periodically rather than waiting for a detail to fail.
Quick final check before display
- Confirm that the silhouette holds after gentle repositioning.
- Test each projection with minimal touch; do not pull or bend it deliberately.
- Inspect ears, tails, tongues, paws, fur edges, and accessories for loose fibres or soft bases.
- Check facial symmetry and proportions from the front, side, and top.
- Look for bald spots, hard lumps, visible joins, and colour gaps under the intended viewing light.
- Make sure no detail can snag on its cover, support, or neighbouring object.
- Photograph the completed figure and note the main fibres and construction choices in case future repairs require a colour or texture match.
The most reliable approach to needle felting small details is to solve structure before surface. A compact wool armature gives the figure something to hold, controlled compaction preserves its softness, and carefully planned joins distribute stress through the form. The result may still require gentle care, but it is less likely to lose its expression at the first touch.